Stoma Measuring Guide

When applying an ostomy pouching system, one of the most important factors is establishing a good connection between the skin barrier and the size of the stoma. To get a good fit, you have to measure the stoma — and that’s not as easy as it sounds.
Why Do Stomas Change Size?
After ostomy surgery, your stoma will be large and swollen. This is normal, and you should see the swelling subside over the next 6 to 8 weeks. Eventually, your stoma will reach a stable size and shape. Not every stoma is perfectly round. Yours might be oval or irregularly shaped, flat or protruding.
Even established stomas can still change size and shape. For example:
- Gaining weight can cause the stoma to retract (sink below skin level). Weight loss can affect the stoma and peristomal skin, too.
- Pregnancy also can change the appearance of the stoma.
- A peristomal hernia is a common complication in which the intestine pushes against the abdominal wall, causing a bump under or next to the stoma. This can change the size and shape of the stoma.
- Prolapse occurs when the stoma elongates outward. It’s often caused by weight gain, pregnancy, coughing, or other strain.
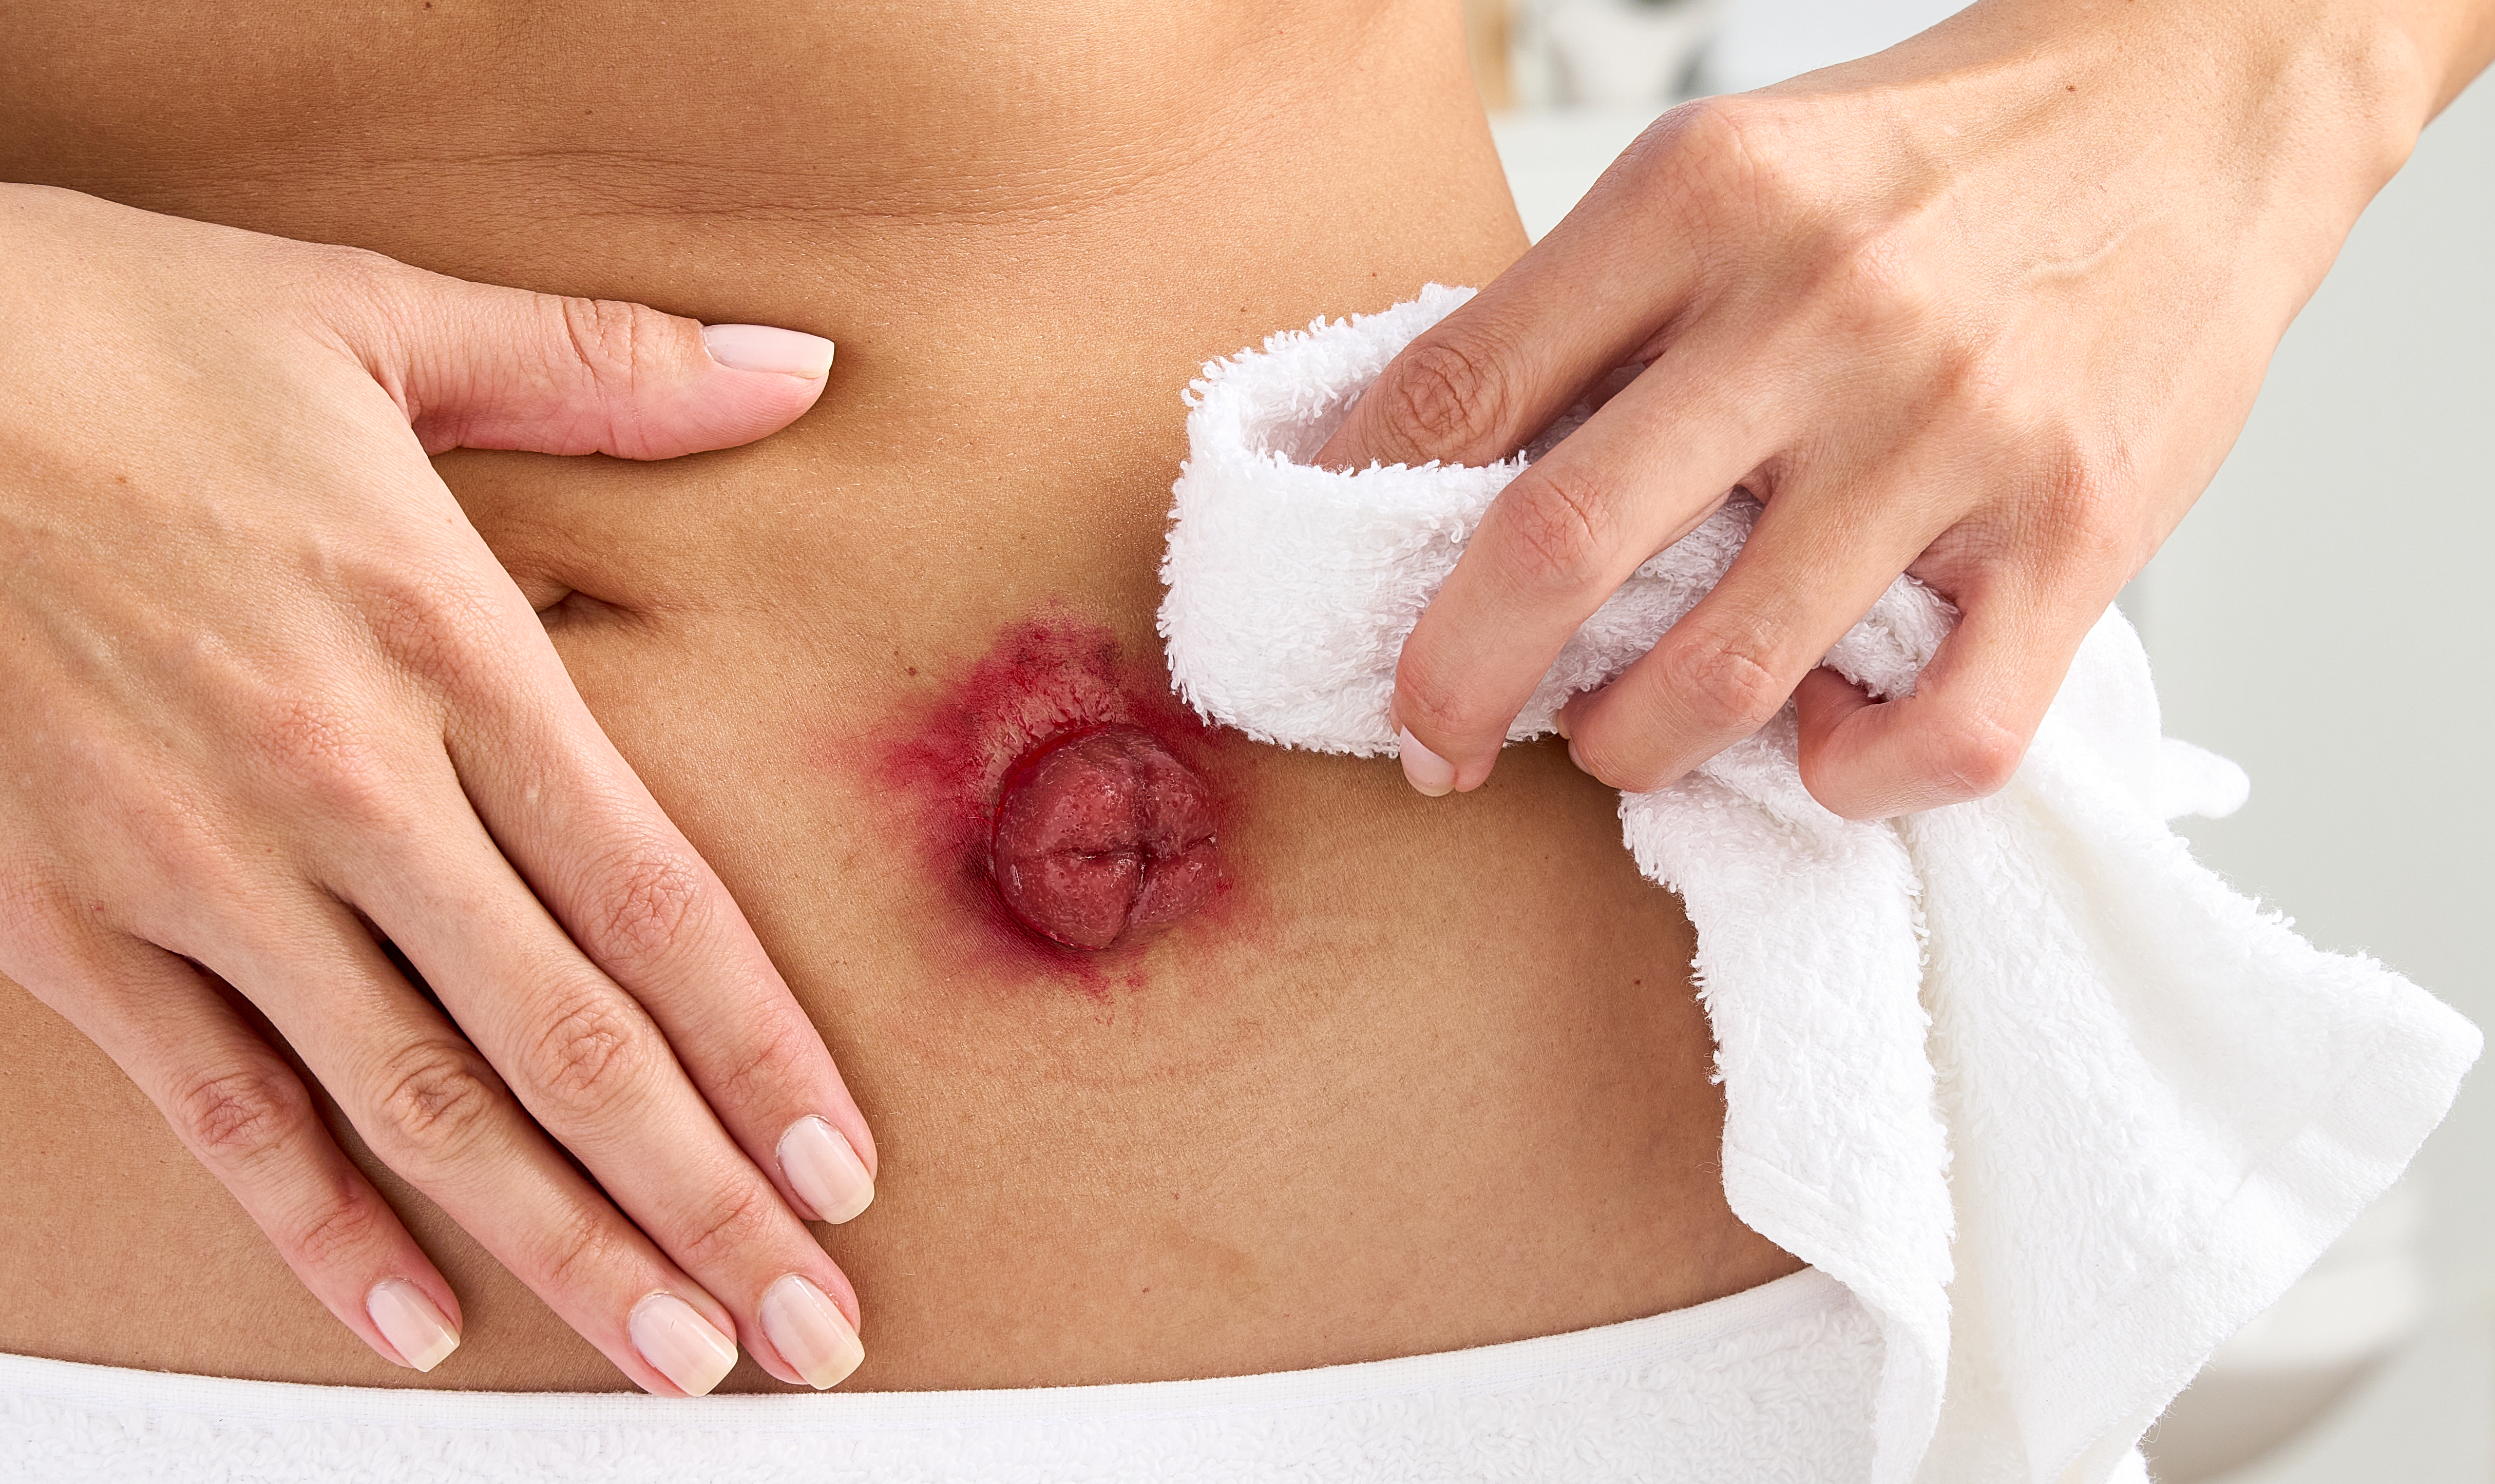
Note: The stoma should always be shiny, pink or red, and moist, like the inside of your mouth. During ostomy pouch changes and while bathing, take the time to inspect your stoma and make sure it looks normal. If your stoma ever appears hard, dry, cold to the touch, flaccid, or a different color (dark red, purplish, dusky blue, gray, brown, or black) you need to seek emergency medical care right away.

Why Measure the Stoma
To ensure a snug fit, you’ll need to make sure the opening of your skin barrier is very close to the size of your stoma. The general rule of thumb is that the opening should be about 1/8 inch (3-4 millimeters) larger than the base of your stoma.
If the opening of your baseplate is larger, output from your ostomy pouching system can damage the skin around the stoma, causing painful skin conditions and problems adhering your ostomy system. If the opening of your baseplate is too small, the edge of the opening may lacerate or irritate the stoma, causing injury or small bumps called granulomas.
How to Measure the Stoma and Cut the Skin Barrier
Step 1: Remove your used skin barrier
Gently peel it off. Then, clean the peristomal skin with water or gentle soap.
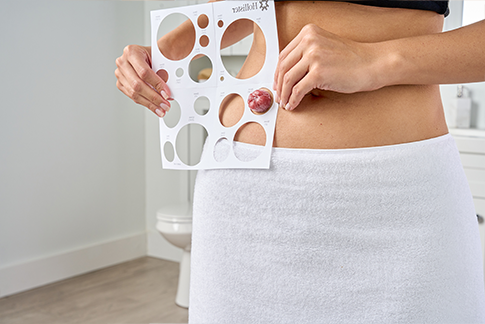
Step 2: Place the guide over your stoma
Try different-sized holes to see which one is the best fit. There should be minimal skin showing between the edge of the guide and the stoma. If you’re using a moldable skin barrier, you want an exact fit; there should be no skin showing between the guide and the stoma.

Step 3: For oval stomas, fold the guide in half
Use the semi-circle shapes to measure the width and the length of the stoma.
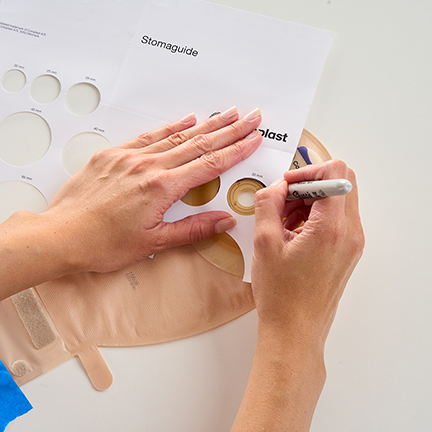
Step 4: Mark the skin barrier
Use a pen to mark the line on the skin barrier that matches your stoma size. For an oval stoma, mark the width and length measurements, then draw an oval connecting them.

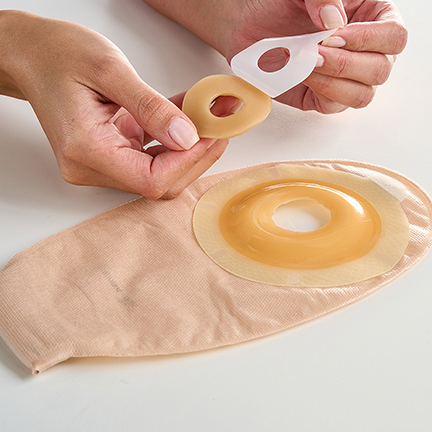
Step 5: Cut the skin barrier
Using small, curved scissors, carefully cut an opening in the skin barrier to match the stoma measurement.

Step 6: Check the size
Before peeling the backing from your skin barrier, place the opening over your stoma to make sure it’s sized correctly. If you’re satisfied with the fit, you can apply your ostomy pouching system as usual.
Get your stoma measuring guide
There’s usually a printed guide included when you purchase skin barriers or ostomy pouching systems. It features circular holes of different sizes. Or, use this free, printable stoma measuring guide. Click here to download and print.
Don’t have a guide or access to a printer? Just use a ruler. Or, in a pinch, you can use coins to measure your stoma:
- A dime = 18 mm or 3/4 inch
- A penny = 20 mm or nearly 7/8 inch
- A nickel = 22 mm or 7/8 inch
- A quarter = 25 mm or 1 inch
- A half dollar = 31 mm or 1 1/4 inches
- A silver dollar (not the Susan B. Anthony dollar) = 38 mm or 1 1/2 inches
