How To Apply a One-Piece Ostomy Pouch

A one-piece ostomy bag or pouch is a simple system in which the skin barrier and pouch are a single unit. Applying an ostomy pouch for the first time may be challenging, but the process will get easier.
Your ostomy bag should be emptied when it’s about 1/3 to 1/2 full and changed every two to four days (or as often as your healthcare provider recommends.) This quick guide will show you how to apply a one-piece ostomy pouch.
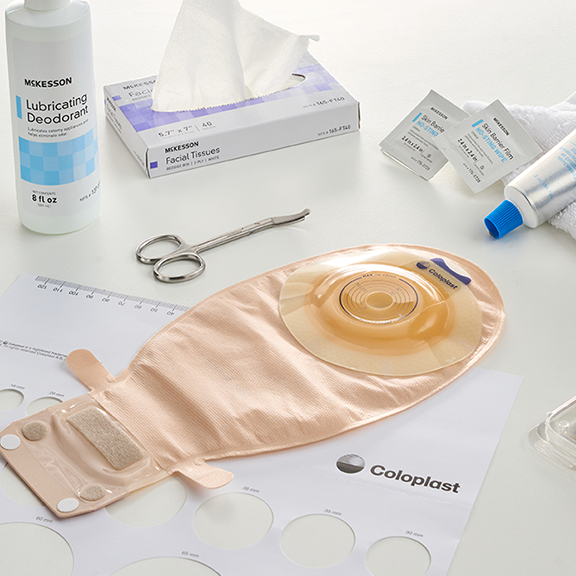
Step 1: Collect your ostomy supplies
- A disposal bag for the old one
- A washcloth or paper towel
- Lubricating deodorant
- A stoma measuring guide and a pen
- Scissors specifically for ostomy barriers
- Stoma paste or a barrier ring
- Stoma powder
Step 2: Remove the used pouch
Wash your hands, then lift the edge of the adhesive and pull downward, gently separating it from the skin. Place the used pouch in the disposal bag (do not flush.) Some pouches can be washed with soap and water after emptying and reused.

Step 3: Clean and dry the stoma and surrounding skin
Gently clean the stoma with water. A little bleeding is normal when you clean the stoma. Clean the skin as your healthcare provider recommends, either with water or with a gentle soap. Rinse and dry the skin. Don’t use any alcohol, lotions, oils, or powder on your skin.

Step 4: Inspect your stoma and surrounding skin
Your stoma should appear moist, shiny, and pink or red. If the stoma has changed in appearance, or if the skin around the stoma looks raw, irritated, bulging, or discolored, call your healthcare provider. Stoma powder can help heal skin irritation.
Read more: How to Use Stoma Powder
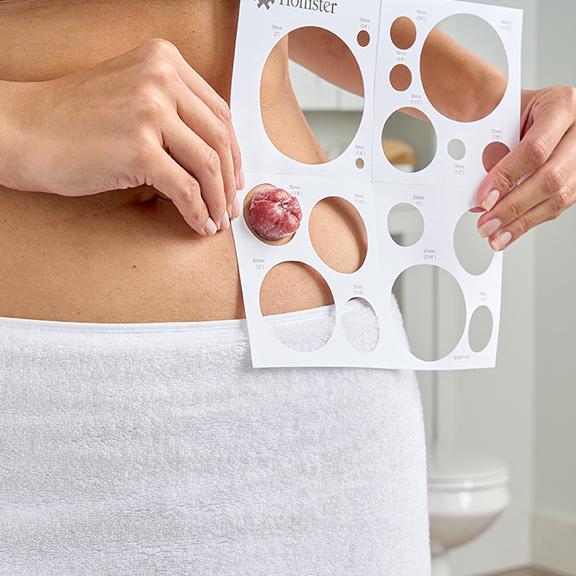
Step 5: Measure your stoma
Stomas shrink over time, so it’s important to make sure the opening of the pouch is the right size for your stoma. Use a stoma measuring guide to find the correct size. There should be no or minimal skin showing between the edge of the guide and the stoma.
(If you’re using a pre-sized barrier opening, skip to step 7.)

Step 6: Trace the opening size onto the skin barrier
With a pen, trace a circle on the skin barrier to indicate the correct size of the opening. Use your scissors to cut along the line, being careful not to puncture the pouch or cut beyond the line on the release liner.

Step 7: Remove the release liner
First, place the skin barrier over your stoma to make sure it’s the right size. Then, peel off the release liner.

Step 8: Add paste or barrier ring (if needed)
Apply the barrier ring or a ring of stoma paste around the opening of the skin barrier, following the product instructions.
Read more: How to Use an Ostomy Barrier Ring
Read more: How to Use Stoma Paste

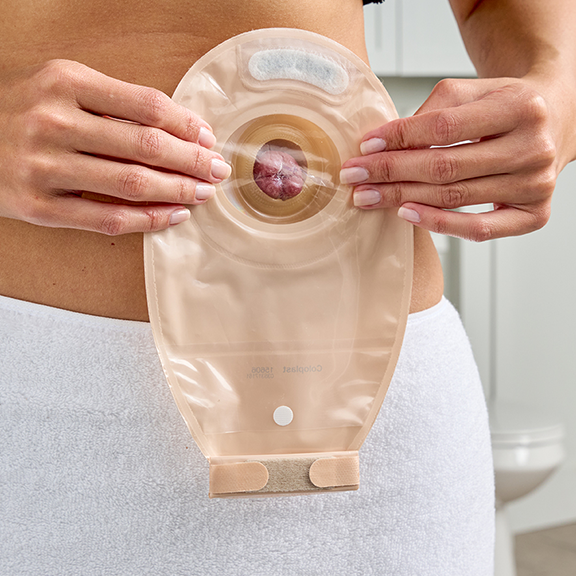
Step 9: Apply the one-piece pouch
Center the skin barrier opening on the stoma and gently press it against the skin for a full minute. If you’re using a barrier with a tape border, remove the backing and gently press the adhesive against the skin.

Step 10: Close the bottom of the pouch
First add about a teaspoon of lubricating deodorant to the inside of the pouch, if desired. Depending on the type of pouch you’re using, it may close with a clamp, clip, Velcro or other type of seal. Read the product instructions. If you’re using a urostomy pouch, make sure the drain valve is closed and facing the right direction.
Read more: How to Use Ostomy Pouch Lubricating Drops
Related Products